AI Background Removal — Instant Transparent Backgrounds for Product, Portrait, and Creative Shots
Anyone who has ever spent an evening with the Photoshop pen tool knows the feeling: zoom in, click, click, click, check the edge, undo, try again. For a single product photo it's a mild annoyance. For a catalog of fifty, it's a Saturday. AI background removal collapses that workflow to one upload and one click. This article explains what the technology does well, where it still needs a human, and how to get clean cutouts from Colourise every time.
Why You Need Background Removal
The use cases stack up faster than most people expect:
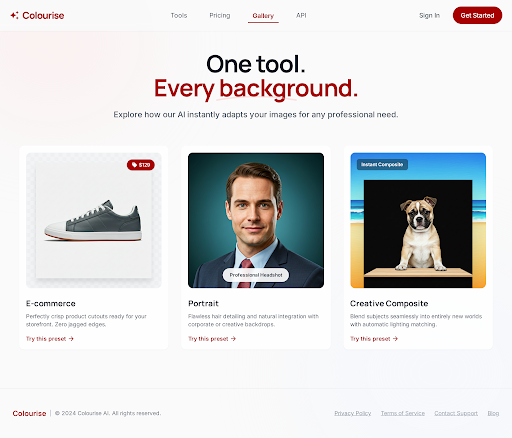
- E-commerce. Amazon, Shopify, and every major marketplace expect product photos on pure white or transparent backgrounds. A consistent cutout makes listings look professional and improves click-through rates. Multiply that across fifty SKUs and the time saved becomes material.
- Professional portraits. A casual phone headshot becomes a LinkedIn profile photo when you cut the subject out and drop them onto a neutral gradient. Same face, dramatically better first impression.
- Creative composites. Birthday cards, family collages, social-media throwbacks, meme templates — all start with a clean cutout.
- Graphic design workflows. Designers often need a subject extracted so they can place it into a mockup (packaging, billboard, magazine spread). Clean edges save hours of masking.
- Presentations and documents. A cut-out person or product reads better on a slide than a rectangular photo with a distracting background.
In every one of these cases, the quality of the cutout is the whole story. Soft hair that gets chopped into a jagged silhouette tells the viewer "this was done cheaply." A pixel-perfect edge is invisible — in the best possible way.
How AI Background Removal Works
Under the hood, modern background removal is a semantic segmentation task. The AI is asked, for each pixel of the image: is this part of the subject, or not? It outputs a mask — a grayscale image where white means subject, black means background, and the gray zone in between is the soft edge (hair, fur, translucency, motion blur).
A few components determine quality:
- Subject detection. The model must correctly identify what's foreground. For a single product on a table, easy. For a person standing in front of a tree with leaves matching their hair color, much harder. Large modern models handle cluttered backgrounds surprisingly well.
- Edge refinement. Hair and fur have thousands of individual strands that no hand-drawn mask can capture. Good AI cutout models use a separate edge-refinement pass that treats these regions with sub-pixel precision.
- Translucency handling. Glass, lace, hair tips, rain — these objects are partially transparent and require proper alpha channel values, not just black-or-white. Cheap cutout tools clip these regions. High-quality tools preserve them.
- Shadow awareness. A cutout that leaves the subject's natural shadow intact looks more grounded than one that removes every gray pixel. The best tools let you toggle this.
The result of all this work is an alpha channel — a transparency mask — attached to your image. When you save the output as a PNG, any software that reads PNG transparency (every modern browser, every design tool, every presentation app) shows your subject cleanly against whatever background you drop it onto.
What Makes Colourise's Background Removal Different
The market is full of background removers. Colourise focuses on the details that actually decide whether a cutout looks professional:
- Hair and fur handling. The edge-refinement pass is trained specifically on portraits and animals. Individual strands of hair come out with real transparency, not the crunchy outline you get from cheaper tools.
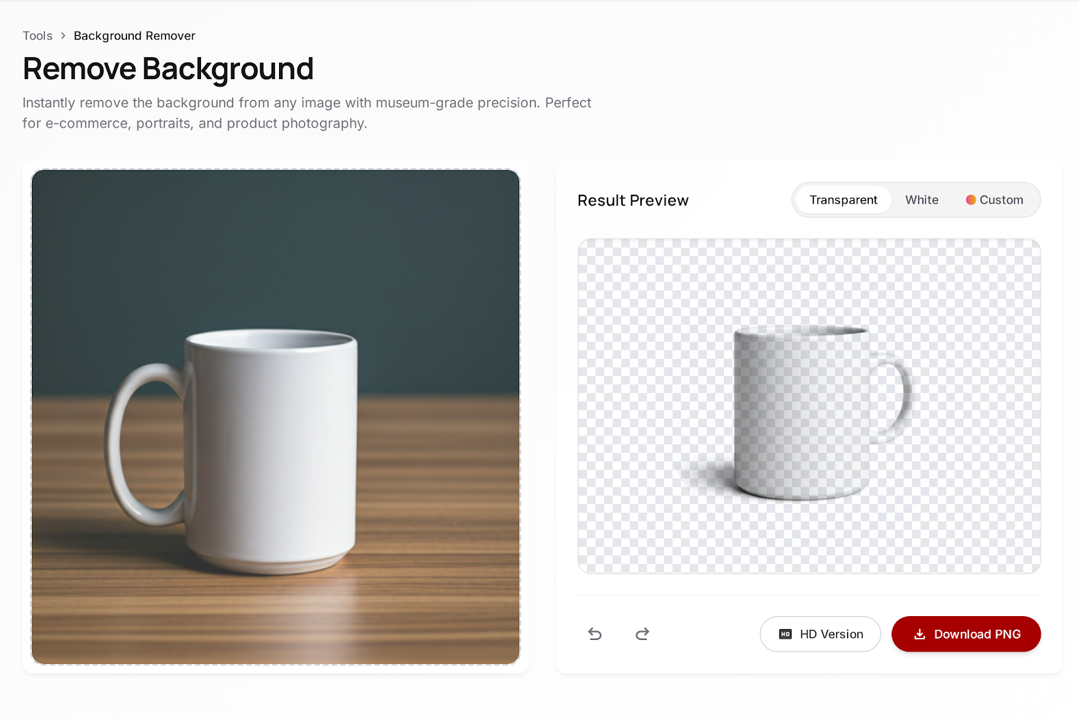
- Translucency preview. Before you download, Colourise shows you the alpha channel rendered against a checkerboard. You can see exactly where edges are crisp and where they're soft — before the file lands on your desktop.
- One-click presets. E-commerce (pure white), Portrait (soft gradient), Creative Composite (transparent PNG) — three presets cover 90% of everyday jobs, so you don't have to think about output settings every time.
- Shadow retention toggle. Keep the natural subject shadow or drop it entirely, your choice per image.
- Consistent batch results. If you upload multiple photos of the same product under the same lighting, they all come back with consistent edge treatment — no manual tuning per image.
How to Remove a Background with Colourise
The full workflow:
- Upload your image. Drag and drop, or click to browse. JPEG, PNG, HEIC, and WebP all work.
- AI cutout runs automatically. Usually under two seconds for a typical photo. You'll see the subject isolated against a transparent checkerboard preview.
- Choose your output background. Transparent (PNG), pure white, or a custom color / gradient. Presets cover the most common destinations (marketplace listings, profile photos, design files).
- Download. PNG for transparency, JPG for solid backgrounds. The file is ready to drop into your store, slide deck, or design file.
Tips for Best Results
The AI does most of the work, but a few shooting habits make its job easier:
- Even studio light for products. Harsh shadows create confusing edges. A softbox or a window with a diffuser gives the AI a cleaner signal.
- Separation for portraits. If the subject's hair is the same color as the wall behind them, even the best AI struggles. A step of separation (or a gradient backdrop) helps dramatically.
- Use the Refine Edges toggle for fur and hair. It's slightly slower but dramatically cleaner on pets, portraits, and anything with soft edges.
- Check the alpha preview. Always inspect the checkerboard view before you download. If something looks jagged or chopped, a small manual touch-up in your editor of choice beats re-running the model.
- Consistent lighting for batches. If you're processing a set of product photos, keep lighting identical between shots. Consistent input = consistent output.
- Glass and liquid. These objects are genuinely hard for any cutout tool. Colourise does well but won't always be perfect. For hero product shots of glass, plan on a small manual cleanup pass.
Frequently Asked Questions
What file formats do you support?
JPEG, PNG, HEIC (iPhone), and WebP on input. On output, PNG (with transparency), JPG (for solid backgrounds), or WebP.
Does it work on complex or cluttered backgrounds?
Yes — modern segmentation models are remarkably robust to cluttered scenes. That said, if the subject and background share color (e.g., a person in a green jacket against green foliage), expect to check the edges manually.
Can I get a transparent PNG with the subject's shadow intact?
Yes. Toggle "Keep natural shadow" before downloading. The shadow comes through at reduced opacity, so the subject looks grounded when dropped onto a new background.
Is there a file-size or resolution limit?
Colourise supports high-resolution inputs suitable for print and marketplace listings. For very large files (above typical DSLR output), processing time will be longer but the result will match the input resolution.
Will results be watermarked?
No. Downloads are clean — no watermark, no overlay, no hidden metadata tags.
Does it work on video?
No. Colourise focuses on photographs. Video background removal (greenscreen-style cutouts on motion footage) is a different problem with different tooling and isn't something we currently offer.
Is my photo private?
Uploads run over HTTPS and are processed in an isolated session. Files are removed from processing servers after your session ends. Your images are yours.